The Splits Challenge - #MakeYourMove
Challenge yourself to this fun activity which will get you super flexible and teach you a cool party trick!

Always wanted to be able to do the splits but never thought you could? Look no further; this challenge will get you closer than you think.
The splits challenge has been especially designed for complete beginners, so take all the time you need in reaching your goal. Even if you are a bit more advanced, make sure you complete the warm up and each step daily to keep yourself injury free.
In this plan you will stretch your muscles and loosen your hips leaving you closer and closer to touching the floor each time.
Remember, you need to do the warm up and stretches each time you practice getting yourself into the Splits position. Give yourself at least one days rest in between challenge sessions. You need to give your muscles time to recover – this challenge is intense.
The challenge in a nutshell
| Your | Why |
|---|---|
| Aim | To go from not being able to do the splits at all, to being able to get close to the floor with your legs wide apart. |
| Benefits | Improves flexibility and the range of movement in your joints, it also Improves circulation and relieves stress. |
| Goal | The length of time taken to do the splits depends on the flexibility of the person taking part, set your personal goal depending on your current flexibility. Don’t push yourself too hard – be realistic about your current state of health and remember to give yourself at least one day of rest between sessions (but don’t give up!) |
| Next steps | Once you have mastered the splits and rediscovered the joys of gymnastics, take a look at the Get Inspired guide with ways of getting into the activity at any level (or age!) |
Your daily routine
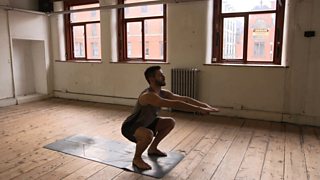
Warm up - The Squat
- Standing with your feet slightly wider than hip width apart, squat down until your thighs are parallel to the floor keeping your back straight throughout the move.
- Rise your back up to a standing position.
Repeat this ten times.
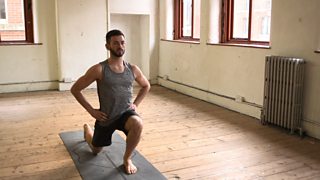
Warm up – The Lunge
- Take one big step forward with the right leg and plant your foot out front, keeping your body relatively straight.
- Your knee should stay over your ankle and not extend out over your toes to minimize stress on the knee joint.
- Repeat this on each leg ten times.
Now you are ready to start your stretches.
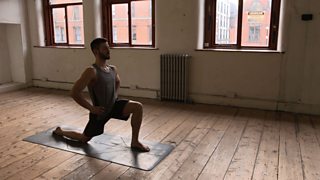
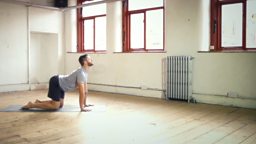
Step 1 - Hip Flexor Stretch
- In a kneeling lunge position push the hips forward stretching your thighs, hips and the backs of your legs.
- Do this twice or three times on each leg and hold for 30 seconds. If you can’t hold for that long to begin with, try for 10 seconds and build up to 30.
Move onto Step 2.
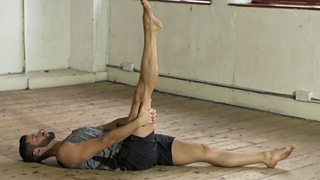
Step 2 - Hamstring Stretch
- Lying on your back with your legs extended and you’re back straight. Keep your hips level and your lower back down on the floor.
- Bend your right knee towards your chest, keeping your left leg extended on the floor.
- Slowly straighten your right knee, grabbing the back of your leg with both hands. Pull your leg towards you gently while keeping both hips on the floor.
- Don’t worry if your leg doesn’t get very high, the more you practice and over time, the easier it will become.
Do this twice or three times on each leg and hold for 30 seconds. If you can’t hold for that long to begin with, try for 10 seconds and build up to 30.
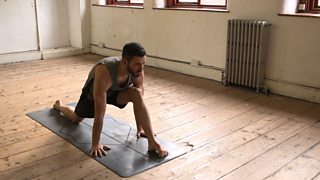
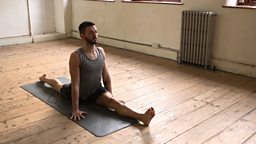
Step 3 - Time to get low
- Lower yourself into a kneeling position with your back straight, stretch your right or left leg straight (whichever is preferred) out in front of you with your back knee bent so your shin is resting on the ground.
- Slowly lower yourself into the split but only go as far as your body is comfortable with
- If you feel any pain that is beyond flexing then stop.
- Keep your hands placed at either side of your body for support.
- Don’t force yourself down. Stop for now and repeat the warm up and stretch every other day and see how far you can go each time.
When you are seeing yourself get more flexible and lower, continue to the final step.

Step 4 – Time to split
- Like in Step 3, lower yourself into a kneeling position with your back straight, stretch your right or left leg straight (whichever is preferred) out in front of you with your back knee bent so your shin is resting on the ground.
- If you feel any pain that is beyond flexing then stop.
- Keep your hands placed at either side of your body for support.
- Slowly continue to lower towards the floor, when your pelvis is resting on the ground and both of your legs are straight, you have successfully performed the splits.
- Build towards holding this this position for 30 seconds.
When you are looking for more of a challenge, build up to a minute. You probably won’t be able to perform the splits on your first attempt but if you practice every other day (allowing your body to recover from the stretching) you will become more flexible. Some days may feel tighter than others but regular practice will improve your range of movement.
Don’t forget
- Track your results - motivation looks different for everyone, but nothing helps you to see progress like looking back at how much you have achieved.
- If you would like to keep a manual diary, print and keep notes.
- Show us how you are getting on. Use #MakeYourMove on , or to join the conversation and see who else is touching their toes and improving their flexibility.
Need more convincing?
This is one of the most difficult Make Your Move challenges, not only because it is incredibly intense on the body, but also because most people think you have to be athletic to achieve the splits. Actually, all it takes is a lot of sensible practice, patience and respect for your body. As we get older we accept that we aren’t as flexible as we were when we were kids, but that doesn’t mean we can’t re-learn how to be flexible. Listen to your body to know when enough is enough, but don’t tell yourself you can’t do something just because you can’t do it instantly.