The Anywhere Yoga Challenge - #MakeYourMove
Get a bit bendy in the comfort of your own home.
If you like the idea of yoga but feel too intimidated to go into a class full of people, this is the challenge for you.
Not only is Yoga a great way to stay limber, but you'll also start to feel more toned and stronger in your legs and arms. The different poses also help mobilise your back and keep your mind alert. What’s not to love about Yoga?
This routine has been designed so that you can do it anywhere – you won’t need a lot of room and you won’t be doing anything too complicated. Plus the variation of steps will give you a great introduction into yoga.
Use the video as a guide, practice the moves in the steps below and give yourself 10 minutes every day to practicing your yoga routine. It doesn’t matter if it takes a bit of time to get it right - the important thing is to keep at it.
This is for people of all ages, sex and abilities, whether you have attempted yoga before or you are a complete beginner. Some days you will be more flexible than others, and some days your right side might be more flexible than your left side (or the other day around) – that is natural. There is nothing wrong with you.
And don’t worry if you are not as flexible as James in the introduction video. He is a yoga instructor. He is supposed to look amazing when he demonstrates the steps. Just do what you can and don’t push your body to do anything that causes pain.
Take your time, learn the moves properly and start to feel the benefits. You’ll be bendy before you know it.
Use the video as a reference and follow the steps below. Please note that we’ve made up our own names for these yoga poses – these aren’t the real names.
The challenge in a nutshell
| Your | Why |
|---|---|
| Aim | To learn a full yoga routine and become more flexible. |
| Benefits | Yoga can improve posture and strengthen core muscles. One of the well-known benefits of yoga is that it reduces stress levels if practised regularly. |
| Goal | Take your time with this challenge, you might not pick it up straight away but stick with it and you will see the results. Give yourself a month to really start to notice the difference, taking note of how far you are able to reach as you progress. |
| Next steps | When you start to feel more comfortable with the routine and want to learn more postures, it might be time to try a class. There are beginner classes all over the country and the peaceful nature of yoga means that the people who go will be nice folk who won’t laugh if you struggle sometimes! |
Your daily routine
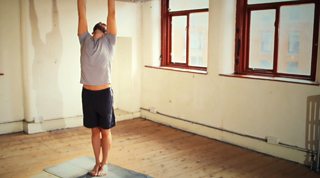
Warm up your body
- Stand on a mat or towel with your feet together, your back straight and your head facing forward with your neck straight.
- Have your hands and arms down by your side to start with
- Breathe in bringing your arms in front of you and up above your head.
- Breathe out bringing your arms down by your side keeping your head and your focus forwards.
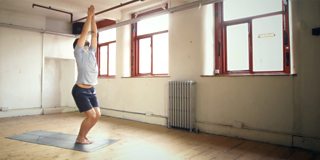
Pose 1 – The Invisible Chair
- Still standing, bend your legs a little and keep your back straight and your bottom out behind you
- Inhale bringing your arms out in front of you, then above your head with palms pressed together
- Exhale straightening the legs and placing the arms back down by your side.
Repeat this 3 times using slow, controlled movements.
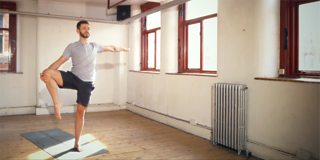
Pose 2 – The Human Turnstyle
- Lift up your right knee as close to your chest as possible and hold for 5 breaths. Don’t worry if you can’t bring it as high or as close to your chest as James. Do what you can.
- Open the left arm to the side giving yourself some balance
- Slowly move your knee to the left hand side, pause and hold for 5 breaths.
- Inhale taking the leg back to the centre
- exhale pushing the foot out in front with a pointed toe and hands on your side. Hold for 5 breaths.
Repeat this on the opposite side.
Pose 3 – Crouching with Hands
- Starting as you did with Pose 1, bend your legs and inhale bringing your arms above your head with palms pressed together. Hold for 5 breaths.
- Stand up slowly while taking your arms out to your sides
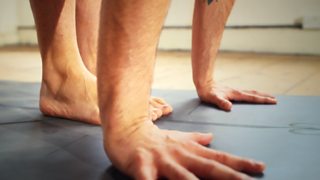
- Bend your knees, bring your back forward into a couching position and take your arms down so that they touch the ground while you are folded over
- Hold for 5 breaths
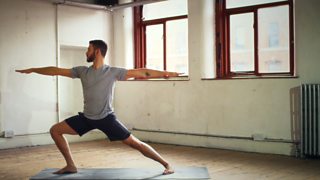
Pose 4 - Sideways leg bend
- Stand with your feet wide on the mat and your arms out to your sides in a straight line
- Turn your right foot to face the side and bend your right knee as you turn your head to face over your toes. Make sure that your knee doesn’t go over your toes at any point.
- Make sure your left leg is straight behind you, and your left foot is still facing the front.
- Hold for 5 breaths.
- Straighten your right leg again, turning your right foot to face forward and turning your head to face forward as well.
Repeat on the other side.
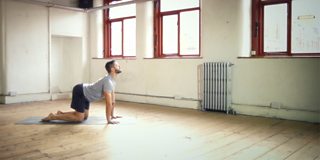
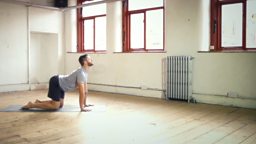
Pose 5 – On the Floor back bends
- Get down onto the mat on your hands and knees
- Make sure your hands are shoulder width apart and your knees are positioned under your hips so your legs are not close together
- Press your ribs down lifting your neck back gently so you are facing the ceiling
- Hold for 5 breaths
- Now do the reverse, so that you are pulling your stomach muscles in, rounding your back and tucking your head under so you are stretching the back of your neck
- Hold for 5 breaths
Pose 6 – Seated toe touch
- With your legs crossed, sit back and roll your body over your feet until they are in front of you. If this is too complicated, just sit back on your behind.
- Put your legs out in front of you close together and stretch your hands as far forwards to the ankles and feet as possible. It may not be very far which is okay. You should feel a gentle stretch in your back and the backs of your thighs, as well as in your shoulders.
- Hold for 5 breaths.
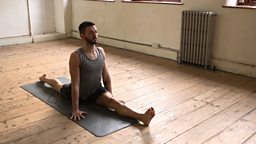
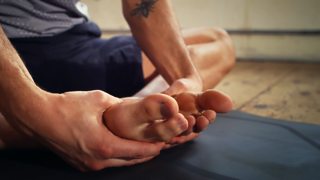
- Keeping your left leg straight, bend your right knee and move it to your side with your right foot tucked into your body (see image)
- Bend your body forward, take your hands down towards your extended foot and ankle as far as you can go without struggling.
- Hold the stretch for 5 breaths.
Repeat this on the left hand side.
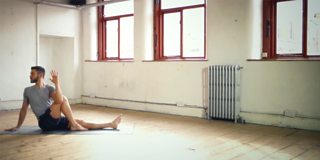
Pose 7 – Leg to the side toe touch
- Still sitting on the mat, put both legs in front of you
- Bend the right knee so your right foot is sitting against your left knee
- Lift your left arm up and when you bring it done bend the elbow
- Twist your back slightly and place your elbow close to the outside of the right knee. If you can’t reach your knee with your elbow, you can put your hand on your right thigh.
- You should feel a satisfying stretch in your back and across your shoulders.
- Hold for 5 breaths.
Repeat on the left hand side.
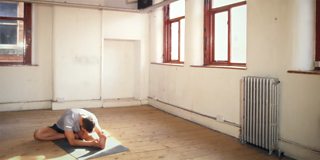
Pose 8 – Seated body twist
- Sit back down on the mat and bend your knees out to the side so your feet are close to your body
- Gently pull your feet together with the bottoms of the feet touching. Don’t worry if you can’t get both knees close to the floor. James has been doing this for years – you just need to get your legs in the right position and feel the stretch.
- Opening up your feet with your hands, push your knees down towards the floor and round your back with your head facing your feet. Again, don’t worry if your knees are nowhere near the floor.
- Hold for 5 breaths.
Pose 9 – Seated Book Feet
- Lay on the mat on your back with your knees bent and pointing towards the ceiling
- Pull your ankles in towards your bottom holding them with your hands if you can reach. Don’t worry if you can’t.
- Push your pelvis and hips up towards the ceiling and squeeze your knees together. It’s important to keep your neck and head facing upwards and your shoulders on the ground in this position.
- Hold for 5 breaths.
- Lower your hips back down to the mat slowly
Cool down your body down
- Still lying on your back keep your knees bent
- Hug both knees into your chest
- Hold for 5 breaths.
- Extend both of your legs out so that you are lying on the mat on your back
- Let your legs relax and give them a small shake
- Turn your hands so that your palms are up and facing the ceiling
- Close your eyes
- Rest for as long as you like. Take this as a little well deserved me time.
Slow your breathing down. You’re done for the day.
Don’t forget
- Track your results - motivation looks different for everyone, but nothing helps you to see progress like looking back at how much you have achieved.
- If you would like to keep a manual diary, print and keep notes.
- Show us how you are getting on. Use #MakeYourMove on , or to join the conversation and see who else is trying out yoga and improving their flexibility.
Need more convincing?
If you are looking for a way to get more active give our anywhere yoga a go. You can work out whilst listening to some soothing music and feel your body relaxing. The exercises will work your core muscles through a combination of slow and steady movements. No need to leave the house, just get yourself a yoga mat or use your carpet!
How to turn this into Baby Yoga

If you have a small child or baby to take care of, then this is the perfect challenge for you. Put the baby on a mat or blanket beside you while you work through the routine. Stay in their eye-line as you move around them and get fitter while being a good parent.